Unlock the Secret to the Best Beer Brats: A Guide to Unbeatable Juiciness and Flavor
Few culinary delights capture the essence of a perfect summer day quite like a succulent bratwurst. But we’re not talking about just any brat. We’re diving deep into the world of the
best beer brats – a method so transformative, it guarantees unparalleled juiciness, incredible depth of flavor, and that irresistible, charred exterior everyone craves. Forget dry, bland sausages; this comprehensive guide will walk you through the time-honored Wisconsin tradition of marinating, simmering in a fragrant beer bath, and perfectly grilling your brats to absolute perfection. Whether it's a casual weeknight dinner, a lively tailgate party, or your annual summer cookout, mastering these steps will elevate your brat game to legendary status.
Why the "Marinate, Boil, Grill" Method Creates the Best Beer Brats
The magic behind truly exceptional beer brats lies in a strategic three-phase cooking process that builds flavor and ensures moisture. Unlike simply throwing raw brats on the grill, which often leads to uneven cooking, dry interiors, or even burst casings, this technique ensures every bite is a revelation.
1.
The Flavorful Beer Bath (Marination & Simmering): This is where the foundation of incredible taste is laid. Submerging uncooked bratwursts in a fragrant liquid of beer, sliced onions, and minced garlic allows the robust flavors to permeate the sausage from the inside out. The gentle simmering then slowly cooks the brats through, rendering some of the fat and infusing them with savory notes, all while keeping them incredibly moist and tender. This crucial step prevents the brats from drying out or bursting when they hit the high heat of the grill. It's essentially a pre-cooking stage that locks in moisture and infuses every crevice with a symphony of tastes.
2.
The Charred Finish (Grilling): Once the brats are perfectly poached in their aromatic bath, they're ready for the grill. This final stage is all about developing that desirable, slightly smoky char and crispy exterior. The direct heat of the grill creates the Maillard reaction – that beautiful browning and crust formation that adds another layer of complex flavor and textural contrast. The brats are already cooked through, so grilling is simply about adding color, char marks, and a touch of smoky goodness, without the risk of an undercooked interior.
This methodical approach results in bratwursts that are consistently juicy, bursting with flavor, and boast a satisfying snap with every bite. It’s the definitive way to achieve the
best beer brats you've ever tasted, whether you're a seasoned grill master or just starting your culinary journey.
Crafting Your Signature Beer Brat Bath: Ingredients and Preparation
The secret to truly flavorful brats begins with the quality of your ingredients and the careful preparation of the beer bath. This foundational step is where your brats soak up all the deliciousness that makes them unforgettable.
Choosing Your Bratwurst
Start with high-quality, fresh, uncooked bratwurst. Look for brats from a reputable butcher or a brand known for its quality. Avoid pre-cooked brats, as they won't absorb the flavors from the beer bath in the same way. Traditional pork brats are a classic choice, but don't hesitate to experiment with veal or even chicken brats if you prefer a lighter option. Remember, the better the sausage, the better the final result.
The Beer Selection
The beer you choose will significantly impact the flavor profile of your brats.
*
Classic Choices: Light lagers, pilsners, or amber ales are excellent options. Their mild, malty, and slightly hoppy notes complement the pork beautifully without overpowering it.
*
What to Avoid: Steer clear of overly bitter IPAs or heavy, dark stouts. These can impart an undesirable bitterness or too strong a flavor that might clash with the bratwurst.
*
Non-Alcoholic Option: If you prefer to avoid alcohol, non-alcoholic beer works perfectly well! It still provides the malty flavor and helps tenderize the brats without the alcohol content.
Aromatics and Beyond
The classic combination of onions and garlic is non-negotiable for that authentic flavor.
*
Onions: Yellow or white onions, thinly sliced or roughly chopped, will release their sweetness and aromatic qualities into the bath.
*
Garlic: Fresh garlic, minced or lightly crushed, adds a pungent depth that is indispensable.
*
Optional Enhancements: For an extra layer of complexity, consider adding:
* A few bay leaves
* A tablespoon of black peppercorns
* Sliced bell peppers
* A pinch of caraway seeds for a traditional German twist.
* A touch of apple cider vinegar for a subtle tang.
To prepare the bath, combine your beer, sliced onions, minced garlic, and any optional seasonings in a large pot or deep skillet. Place the uncooked brats into the liquid, ensuring they are mostly submerged. Add more beer or even a splash of chicken broth if needed to cover them. Bring the mixture to a gentle simmer over medium heat, then reduce the heat to low and let them cook gently for 15-20 minutes. The key is a gentle simmer, not a vigorous boil, which could cause the casings to burst.
Crucially, do not pierce the brats at any point during this process – you want to keep all those precious juices locked inside! This simmering step can be done ahead of time, making it perfect for meal prep or party planning. For more amazing grilling ideas, check out our guide on
Summer's Best Beer Brats: Easy Grilling for Juicy Flavor.
Grilling to Perfection: Achieving That Golden Char
Once your brats have enjoyed their luxurious beer bath, it's time to give them that irresistible grilled finish. This step is about adding color, char, and a smoky essence without overcooking.
1.
Preheat Your Grill: Set your grill to medium-high heat (around 375-400°F or 190-200°C). If using a charcoal grill, aim for medium-hot coals. Ensure your grates are clean and lightly oiled to prevent sticking.
2.
Remove from the Bath: Carefully transfer the brats from the beer bath to a plate. You can pat them lightly with a paper towel if desired, but it's not strictly necessary.
Again, resist the urge to pierce them!
3.
Grill Them Up: Place the brats directly over the heat. Grill for approximately 8-12 minutes, turning them frequently with tongs to achieve even browning and char marks on all sides. You’re looking for a beautiful golden-brown color and a slightly crispy exterior. Since the brats are already cooked through from the simmering process, this step is relatively quick.
4.
Internal Temperature Check: For food safety and optimal texture, the internal temperature of the bratwurst should reach 160°F (71°C). Use an instant-read thermometer to check the thickest part of the sausage.
5.
Resting (Optional but Recommended): Once grilled, transfer the brats back to a clean plate or even briefly back into the warm beer bath (off the heat) to keep them warm and juicy while you prepare your buns and toppings. This short rest allows the juices to redistribute, ensuring maximum succulence.
For those who want to explore more advanced techniques to take their brats to an even higher level, read our article
Grilled Beer Brats: Take Your Classic Recipe to the Next Level.
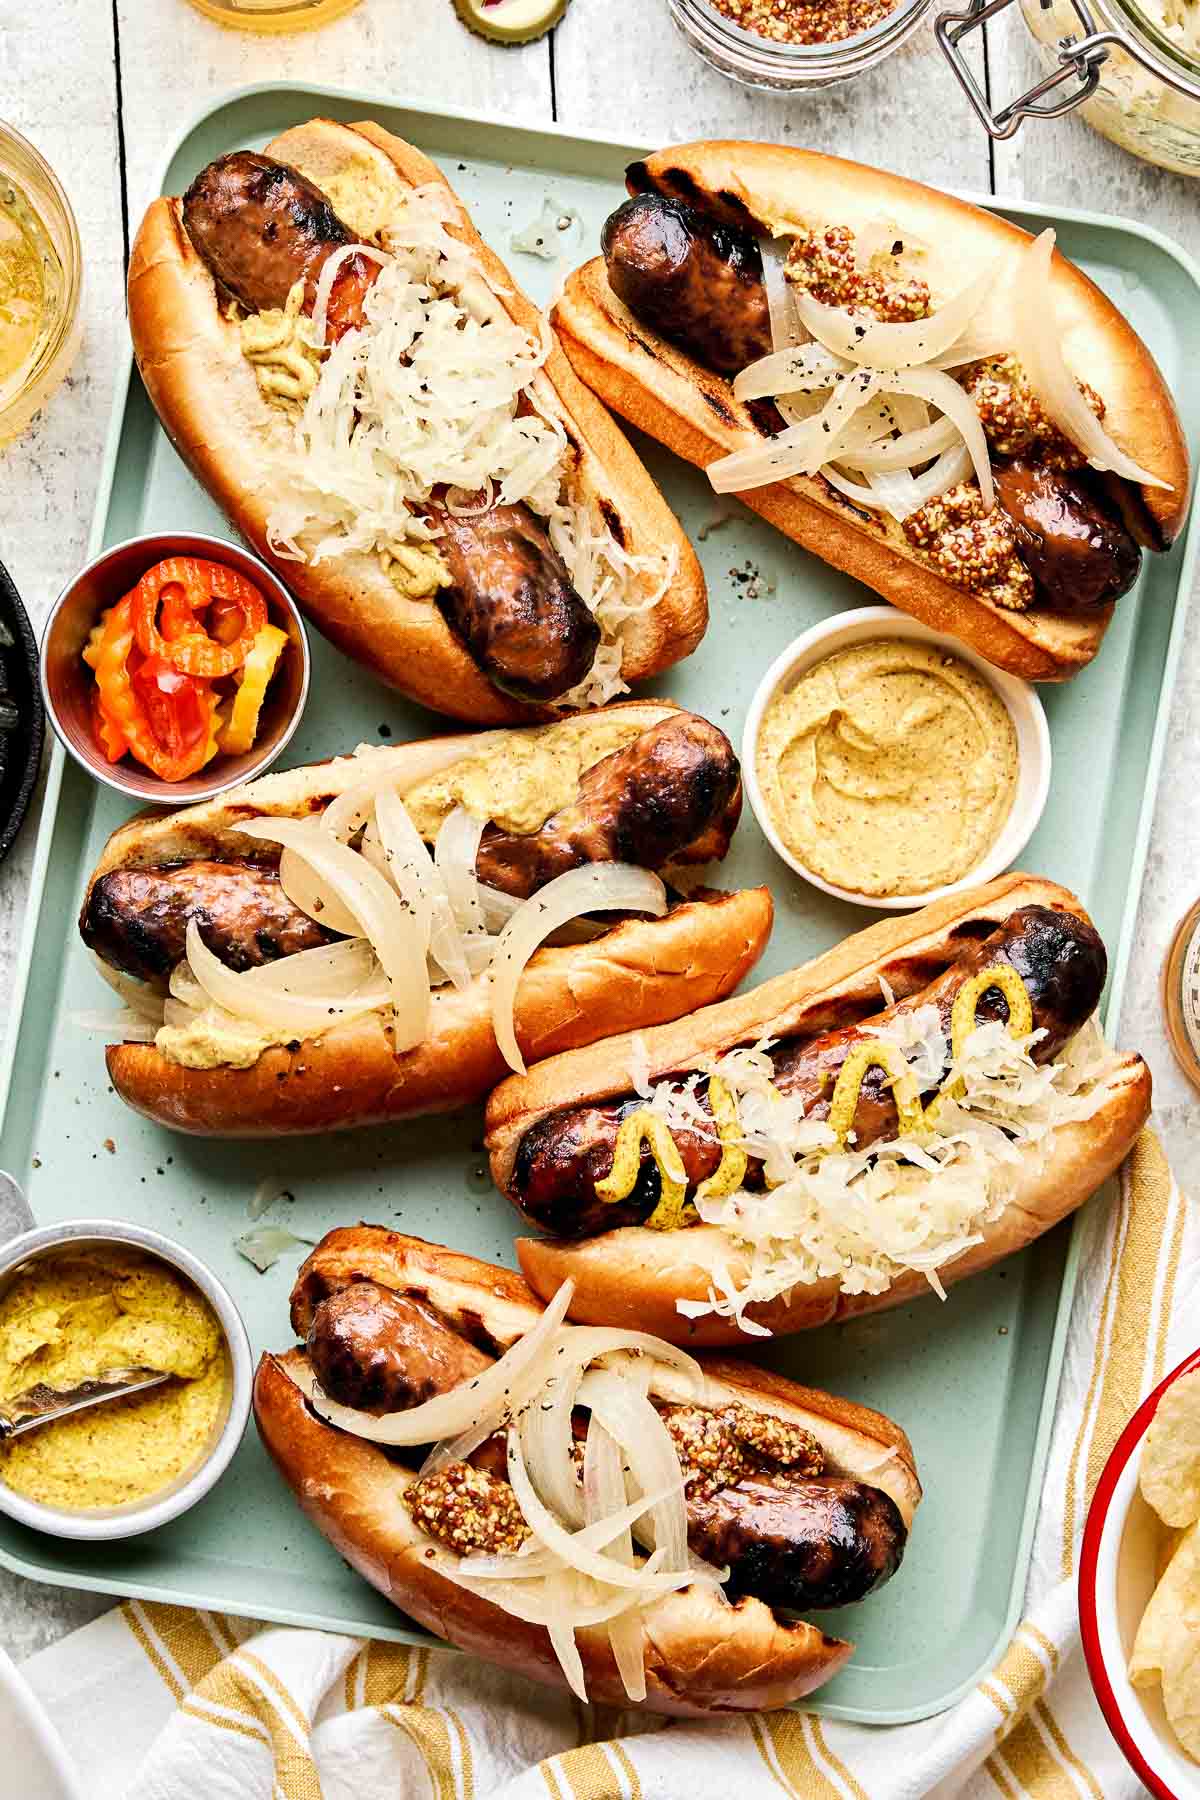
Serving Your Masterpiece: Buns and Toppings for the Best Beer Brats
A truly great beer brat experience isn't complete without the perfect vessel and an array of tantalizing toppings.
The Essential Bun
Don't underestimate the power of a good bun! A sturdy, yet soft, hoagie roll or dedicated brat bun is ideal. Avoid flimsy hot dog buns that will fall apart under the weight of a juicy brat and toppings. Toasting your buns adds another layer of flavor and texture:
*
On the Grill: Briefly place the split buns face down on the grill for 1-2 minutes until lightly golden.
*
With Butter: Brush the cut sides with melted butter before toasting for an extra rich flavor.
Toppings Galore
Here’s where you can truly customize your
best beer brats experience:
*
Classic & Essential:
*
Cooked Onions from the Beer Bath: Do NOT discard these! They are incredibly flavorful, soft, and sweet – a must-have topping.
*
Sauerkraut: The tangy, fermented cabbage cuts through the richness of the brat beautifully.
*
Spicy Brown Mustard: A classic pairing that adds a zesty kick. Honey mustard is also a popular choice.
*
Ketchup: For the purists or those who love a touch of sweetness.
*
Elevated & Creative:
*
Caramelized Onions: Sautéed separately until deeply golden and sweet.
*
Grilled Peppers and Onions: Sliced bell peppers and onions, grilled until tender and slightly charred.
*
Cheese Sauce: A sharp cheddar or beer cheese sauce for an indulgent twist.
*
Pickled Jalapeños or Relish: For added crunch and a spicy or sweet-sour contrast.
*
Bacon Bits: Because everything's better with bacon.
*
Chili: Make it a chili-cheese brat for ultimate comfort.
Provide a generous selection of toppings so everyone can build their dream brat. This makes the meal interactive and ensures there's something for every palate.
Tips for Success and Troubleshooting
To ensure your journey to the
best beer brats is smooth and delicious, keep these tips in mind:
*
Don't Pierce the Casings: This cannot be stressed enough! Piercing the brats, whether before or during simmering, allows those precious juices and fats to escape, leading to a dry, less flavorful sausage.
*
Gentle Simmer is Key: A rolling boil can cause the casings to split prematurely and toughen the meat. Keep the beer bath at a gentle simmer.
*
Make Ahead Marvel: The beer bath step can be done hours or even a day in advance. After simmering, let the brats cool in the beer, then store them in the refrigerator. Reheat gently in the beer bath before grilling. This is a fantastic strategy for parties!
*
Indoor Option: Don't have a grill or facing bad weather? You can still make amazing beer brats! After the beer bath, finish them in a hot cast-iron skillet for a beautiful sear, or under a broiler for a charred effect.
*
Batch Cooking: When cooking for a crowd, simmer all your brats in large pots. You can then grill them in batches or keep them warm in the beer bath until ready to serve.
*
Pairing: Serve your beer brats with classic sides like potato salad, coleslaw, corn on the cob, or a simple bag of chips for the ultimate cookout spread.
Conclusion: Your Path to the Ultimate Beer Brat
From humble beginnings in a pot of beer, onions, and garlic, to the sizzling embrace of a hot grill, the journey to creating the
best beer brats is a rewarding one. This comprehensive method ensures every brat is juicy, infused with incredible flavor, and boasts that perfect charred snap. It's a culinary technique that transforms a simple sausage into a gourmet experience, making it a perennial favorite for summer cookouts, festive gatherings, or even a comforting weeknight meal. So fire up your grill, gather your ingredients, and prepare to delight your taste buds with beer brats that are truly in a league of their own.